If your business is in the process of adopting document digitization, you are likely faced with the task of converting paper documents into digital formats. Yet, managing and arranging these digital files can prove to be unexpectedly intricate and time-consuming, requiring a significant investment of your time and resources.
So, how can you simplify this process? Document indexing is the key solution. By automating document indexing using intelligent document processing software, your business can enhance its digital archive and existing database.
In this blog, you will learn about the concept of document indexing, the types of file indexing, and what the overall process looks like. Lastly, you will discover how to index documents using Doxis’ IDP platform. Let’s start!
Key Takeaways
- Document indexing simplifies digital document management – It organizes large volumes of digital files with tags or labels, making searching and retrieval fast and efficient.
- There are multiple types of document indexing – Choose between full-text indexing, metadata indexing, or automated field data indexing based on your business needs.
- Doxis’ AI.dp IDP platform automates document indexing – Doxis’ platform integrates data extraction, document conversion, sorting, and verification into a seamless workflow.
- The process is straightforward with AI.dp’s flow builder – Upload files, set data capture models, classify documents, and automatically export them to designated folders with indexed names.
What is Document Indexing?
Document indexing is the process of organizing digital documents with searchable tags, labels, or metadata (such as dates, vendor names, client IDs, or document type) so they can be retrieved quickly from a document management system or database. This turns unstructured or semi‑structured files into searchable, structured data.
Indexing can be full-text (making every word searchable via OCR), metadata-based (applying specific tags), or field‑based (indexing particular data fields like invoice number or customer name).
Types of Document Indexing
When it comes to indexing documents, there are several approaches you can choose from. The method you select depends on your unique use case and the volume of documents you intend to index.
Full-text Indexing
Full-text indexing involves scanning the entire contents of the file, giving you the ability to search anywhere within the document for keywords or phrases that help you find what you’re looking for.
This method is synonymous with the ever-so-popular command “find” (Ctrl+F or Command+F), found in the majority of processors and web browsers. It is also the easiest type of indexing you can use, as it is intuitive for users and, frankly, quite straightforward.
Metadata Indexing
As its name suggests, for this type of file indexing, you add metadata when scanning or digitizing the respective file. Metadata is represented by tags or other information that is relevant when searching for documents at a later time.
When it’s time to retrieve a document, the software scans only the metadata, instead of the entire document. Metadata can also be considered as alt text, which, instead of being used for describing or labeling visuals, is used to label documents.
Automated Indexing Using Field Data
Similar to metadata indexing, field-based indexing focuses on various information sources within a database, otherwise known as data fields. It automatically targets key data fields, such as customer names or document numbers, which are then matched up against an existing database.
For example, if you work mainly with financial documents, you might use field-based indexing to search your database for entries that have a certain name in the “vendor” field or a certain number in the “total amount” field.
Now, let’s see what happens behind the scenes when documents are indexed.
How does Document Indexing Work?
Determining the best-suited document indexing type involves first understanding the intention behind indexing documents. It’s important to determine the specific information employees are likely to seek and the terms they typically employ in their searches, to facilitate this process.
Once you’ve grasped your employees’ preferences and identified the optimal document indexing type, the actual process of indexing documents remains relatively uncomplicated. It is mainly concerned with systematically sorting through both scanned and digital documents to locate designated key terms.
Identify the specific purpose for indexing the documents
The choice of indexing method hinges on the nature of the documents you’re dealing with, whether they are invoices, employee records, or any other type. It’s crucial to also consider who has access to retrieve these documents and for what purpose. For instance, understanding if employees need access for reference or if specific teams require it for analytical purposes will guide your indexing strategy.
Determine the best indexing method for your use case
Certain document categories may require less detailed indexing for convenient retrieval. Take invoices, for instance, where basic information such as the vendor’s name or account number could be sufficient for effective file indexing and quick retrieval.
Index the relevant data
Once the optimal document indexing type has been identified, you have the option to either manually index the data or, preferably, delegate the task to a software solution:
- Manual indexing: Manual indexing relies on establishing connections between words in a document and a specific term, which is used to retrieve the file later in time. that are manually assigned as indexing terms. However, the rate of encountering duplicate metadata descriptions is also enhanced, making it a challenge to track all manually indexed documents accurately.
- Automated indexing: Employing software for automatic document indexing simplifies the process greatly. It only requires establishing rules that specify what document types should be prioritized, allowing for automated classification and sorting to happen, all based on a certain keyword.
Now that we’ve peeled back the layers of how document indexing works, let’s see the practical steps you need to take so your documents are indexed in no time!
How to Automate Document Indexing: Step-by-Step
Doxis AI.dp stands as an Intelligent Document Processing platform designed to automate the process of indexing all types of documents you need. With our unique flow builder, you can create your own document indexing workflow in just a few steps.
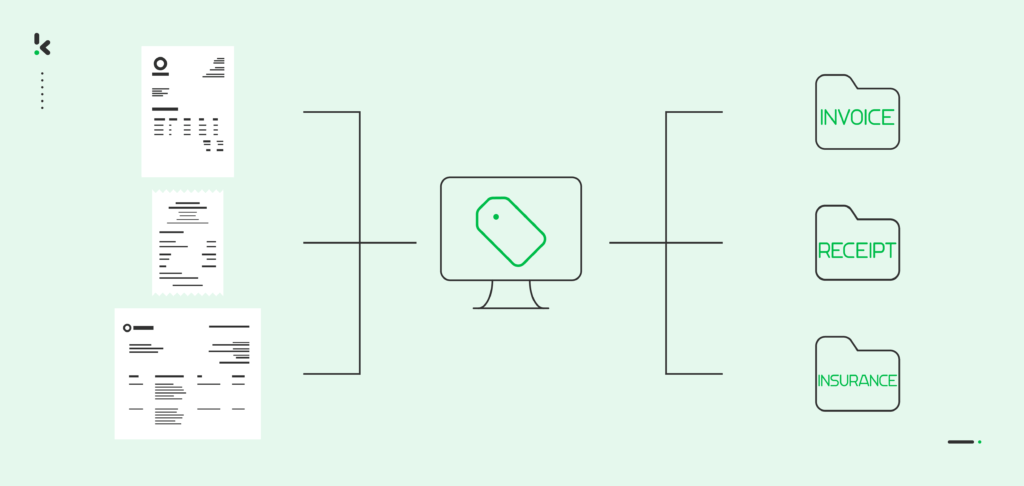
For our example, we wanted to index documents in 4 categories: invoices, receipts, insurance, and other. Our sample document was an invoice, and the merchant’s brand name was used as the new file’s name.
Let’s dive in!
Step 1: Scan Your Documents
To start indexing your documents, you need to decide which method you want to use. You can a) use a scanner to make digital copies of your files, or you can b) simply use your smartphone camera instead. For the second method, you can use Doxis’ mobile scanning SDK for more accurate information extraction results.
After scanning your documents, you can store them in a cloud folder for easier access. You can access it on Google Drive, OneDrive, or Dropbox.
Step 2: Sign up on the platform
The first step is to sign up for our AI.dp Platform. Signing up is straightforward: just visit Doxis’ website, click on the sign-up button, and fill in details like full name, company name, use case, and document volume.
Once registered, you’ll receive €25 in free credits so you can explore the platform’s features and see if Doxis AI.dp is the right solution.
After this, create an organization and set up a project to access the services.
Now, you can select the Document Capturing – Financial Model, Document Capturing – Prompt Builder, and Flow Builder services, just as seen in the image below.
The Financial Model is the best capturing model to use in this situation because it was designed to automate the extraction, analysis, validation, and classification of data from various types of financial documents, including receipts, invoices, purchase orders, bank statements, and more.
Step 3: Create a preset and a prompt
Before going to the flow builder, you first need to configure a preset and a prompt builder.
Preset creation
The preset allows you to extract the fields you need from the files.
To do this, go to the left column. Select Financial Model and then + New Preset. Name the preset and choose the necessary component. In our case, the most important ones are Financial, Line items, and Document classification, but you can customize the preset further if you’d like.
Lastly, click Save.
Prompt creation
The prompt builder allows you to create specific prompts for your data capture module, depending on your use case.
To do this, go to the left column. Select Prompt Builder and then + New Preset. Name the prompt and click + Start from scratch. Give the field a name and enter the following prompt: How would you classify this document? (invoice, receipt, insurance document, or other)?
After, click + Add Field and save the prompt.
Step 4: Select Your Input Source
To get the workflow started, go to the platform’s flow builder. A flow is a sequence of steps that define how your document data is scanned and then indexed into your chosen destination.
On the left side, select Flow Builder and create a new flow by clicking New Flow -> + From scratch and assign your flow a name.
Tip: You can create a new flow from scratch or use a pre-existing template. For our example, we did it from scratch.
Once you’re in the flow builder, the next step is to select the location of your files where you want to extract the data. For this example, you can upload your scanned files into a Google Drive folder (from step 1) so you can later retrieve your files for data extraction. You can use any input source, be it the cloud, email, or even FTP.
To add an input source, click on the 1. Select Trigger bubble and search for Google Drive. The trigger can be either a new file or a new folder. For our example, we chose a new file as a trigger, as seen in the image below.
On the right side of the screen, connect your Google Drive and select the folder where the documents are. Make sure to toggle the Include File Content button also!
Test this step by clicking on Load Sample Data: remember to have at least one sample document in your input folder while setting up your flow. Remember to test the following steps also!
Step 5: Capture and extract data
The next step is to select the document capture module, which extracts all the data fields from the documents in the input folder. For our use case, we need to use 2 types of capturing models, each being a separate step in the flow builder.
Financial Model
Since we’ve created a specific preset for this use case, simply select the Document capture: Financial Model module from the list and configure the following:
- For Connection: Default AI.dp Platform
- For Preset: Preset created in step 2
- For File or URL: New file -> Content.
Prompt builder
We’ve created a specific prompt for this also. Simply select the Document capture: Prompt Builder module from the list and configure the following:
- For Connection: Default AI.dp Platform
- For Configuration: Prompt created in step 2
- For File or URL: New file -> Content
Step 6: Classify documents
Before we can index documents, we first need to classify them. To do this, add Router as the next step of the flow by clicking on the + button below the previous step. For Execute, leave on Only the first (left) matching branch. For Branches, add 2 more by clicking the + Add branch button.
To make it easier, rename the branches based on the classification you want to have. For example, Invoices, Receipts, and Insurance. The Otherwise branch will route any documents that don’t fall into one of the categories above.
Click on each branch individually and configure the following, one per box:
- For the Invoice branch: Document Capture: Prompt builder -> components -> prompt_builder -> classification; Text (Starts with); invoice
- For the Recepits branch: Document Capture: Prompt builder -> components -> prompt_builder -> classification; Text (Starts with); receipt
- For the Insurance branch: Document Capture: Prompt builder -> components -> prompt_builder -> classification; Text (Starts with); insurance
Step 7: Save the file
Now that you have extracted and converted your data into your preferred format, you’ll want to store it somewhere. Depending on your use case, you can store it in the cloud, send it via email, or integrate it into various applications, such as ERP, CRM, or bookkeeping software.
For this example, we chose Google Drive again, and we’ll set the invoice number as the file name with the extracted data. Before proceeding, create new folders in Google Drive with the branches’ names (including the Otherwise branch) as the final destinations.
Back to the Flow Builder, press the + button under the first branch and select Google Drive -> Upload file. Connect your Drive again to our platform and select which component will name your new file. We wanted the merchant’s brand name to be the new file’s name.
To do this, configure the following:
- For File Name: Document Capture: Financial Document -> components -> financial -> merchant -> brand_name (or any other component)
- For File: New file -> content
- For Parent Folder: The name of your output folder (Invoices, Receipts, Insurance, Otherwise)
This needs to be done for each branch, one by one! At the end, you should have something like this:
Guess what? That was it! Congratulations! The documents are now available in your Google Drive folder, indexed with the proper tags. Like this, it’s going to be easier than before to find them later!
What’s left to do is test and publish the flow, and any new documents added to the folder will be processed automatically.
And remember: if you’re processing a high volume of documents, you don’t have to set up the flow yourself! Feel free to reach out to us because we’d love to help you out!
Benefits of Indexing Documents
- Improved information flow: The challenge of locating documents is a common hassle for many organizations. Some files are digitized, others are buried in email attachments, and some still exist in a traditional paper format. With automated document indexing, finding and retrieving documents is easier, improving the whole flow of information.
- Facilitates better collaboration and streamlined workflows: Simplified document access promotes more effective teamwork, with shared and indexed documents ensuring that the appropriate employees can access the required information anytime, anywhere.
- Simplified audit compliance: When documents are well-organized and indexed based on factors such as fiscal year and other relevant metrics, retrieval becomes effortless in the event of an unplanned audit.
- Time-saving: Employees invest a significant amount of time filing through documents to locate the necessary information or files. Implementing an effective indexing process allows you and your team to redirect this time toward more strategic endeavors for your business.
- Cost Efficiency: Organizations often incur unnecessary expenses as employees dedicate substantial time to manually searching for documents. By adopting an automated document indexing system, you not only save time but also reduce operational costs associated with labor-intensive document retrieval.
For precise automated document indexing and high-quality results, a reliable Intelligent Document Processing solution is essential. The Doxis IDP platform provides your business with the essential tools to swiftly index all your business’s files.
Ready for Automated Document Indexing?
Doxis’ AI.dp IDP platform allows you to automate all tasks involved in indexing and organizing your documents for seamless integration into your document management systems. Through seamless integration of various platform modules with your preferred applications, you can establish a smooth and tailored workflow.
With our end-to-end solution, you get:
- Data extraction – Get data extracted automatically from a variety of documents
- Document conversion – Convert documents into several business-ready data formats, such as JSON, XLSX, CSV, TXT, XML, and many more
- Document sorting – have your documents sorted based on their industry or use case, for an enhanced use of document management
- Document verification – Automatically verify documents in numerous ways and detect document fraud
If you want to know more, don’t hesitate to contact our experts or book a demo down below!
FAQ
Document indexing is the process of organizing digital documents with searchable tags, labels, or metadata so they can be retrieved quickly from a document management system or database. This turns unstructured or semi‑structured files into searchable, structured data.
With Doxis AI.dp, this process is fully automated: the platform reads both scanned and digital files, extracts key data, applies classification rules, and saves the indexed files with searchable names, integrating them directly into your document management system.
Effective indexing starts with defining which information must be retrievable, e.g., client name, invoice number, fiscal year, and using consistent tags or metadata. For large collections, automated indexing is preferred: OCR scans entire content or targeted fields; AI-powered IDP software applies classification rules; and database lookups auto-fill index fields using matching identifiers.
Doxis AI.dp streamlines this: you set indexing logic in its Flow Builder, configure tags or classification prompts, and it ingests files from cloud, email, or scanner folders, automatically categorizing and saving them with indexed file names.
1. Full-Text Indexing: Makes every word in the file searchable using OCR, ideal for unstructured content like contracts or reports.
2. Metadata Indexing: Tags documents with key details like author, date, or department – faster retrieval for known fields.
3. Field-Based Indexing: Targets specific data fields within structured documents, e.g., “Vendor” or “Total Amount” in invoices.
Indexed documents make audits faster and less stressful by ensuring files can be located instantly using relevant tags such as fiscal year, invoice number, or project code. This reduces time spent manually searching and supports compliance with retention policies. Automated indexing also improves accuracy, reducing the risk of missing files or mislabeling them.
Doxis AI.dp offers compliance-ready indexing: it applies consistent metadata, enforces naming rules, classifies by audit criteria, and integrates with secure storage to meet GDPR and industry audit standards.
Automation uses OCR and AI-driven IDP systems to ingest files from defined sources (cloud folders, email inboxes, scanners), recognize document type, extract metadata or key fields, classify them, and save with indexed filenames to defined destinations. Advanced automation includes database lookups to auto-complete fields, barcode recognition, and machine learning to adapt classification rules over time.
Doxis AI.dp combines all these features: from ingestion via 100+ connectors, to AI classification, fraud detection, and secure GDPR-compliant output, eliminating the need for manual tagging.
Yes. Doxis AI.dp scales to millions of files with consistent indexing logic, ensuring speed and accuracy even under heavy loads. It supports bulk ingestion from enterprise systems, applies classification across formats (PDFs, scans, images, Office files), and delivers searchable outputs in business-ready formats (JSON, XLSX, XML, CSV).
Yes. Scanned files are processed through Doxis’ OCR engine, turning them into searchable text before indexing. Native digital documents (PDF, DOCX, XLSX) skip OCR and are indexed directly for speed.