Have you ever been overwhelmed by the sheer volume of business emails and file attachments that need to be processed? You’re not alone. Important business data is frequently concealed within the maze of email exchanges, making it difficult not only to navigate through it but also to type it into a spreadsheet and analyze it.
Using Excel to gather and organize all your business data is a popular strategy for managing information. However, doing it manually can create more problems than solutions. But with modern-day technologies, you can transform Outlook emails into an Excel format seamlessly.
Whether you’re dealing with supplier invoices, purchase orders, customer queries, managing orders, or keeping tabs on project progress, transitioning your Outlook email content directly into Excel greatly simplifies your workflow. In this blog, you will learn how to build your automated workflow to convert Outlook emails to Excel with Klippa DocHorizon in just a few steps. Let’s start!
Key Takeaways
- Outlook emails often contain valuable business data that is hard to manage manually; automating the extraction and conversion process greatly improves efficiency and accuracy.
- The benefits of automating Outlook email to Excel conversion include better data organization, improved accuracy, significant time savings, enhanced security, and reduced operational costs.
- Klippa’s automation platform offers a user-friendly experience, GDPR and ISO-compliant security, smart data extraction, document verification, and flexible integration options to ensure seamless document processing and maximum operational efficiency.
- Klippa DocHorizon’s workflow to automate this process involves signing up on the platform, selecting the Outlook email source, extracting and capturing data from email attachments, converting the data to Excel, and exporting the final output.
Benefits of Exporting Outlook Emails to Excel
Leveraging your email data effectively can unlock new potential for your organization. Here’s how Klippa can bring great advantages to your organization:
- Enhance Organization in Your Business: Experience the simplicity of having all your email information neatly organized in one place. Transform your cluttered inboxes into well-structured, easy-to-navigate spreadsheets, enabling quick access and better data management.
- Keep Accurate Track of Data: Dive deep into your business information with Excel’s robust analytical tools. Klippa facilitates this transition, allowing you to perform detailed analyses, identify trends, and make informed decisions with ease.
- Seamless Workflow Automation for Peak Efficiency: Klippa automates the conversion from Outlook emails to Excel, streamlining your workflows, minimizing errors, and freeing up valuable time for strategic tasks.
- Ensure Data Privacy and Security: Trust in Klippa’s commitment to data security and compliance with data privacy regulations. We ensure that your information is processed securely, maintaining confidentiality and compliance every step of the way.
- Optimize Costs and Reduce Processing Times: Benefit from the dual advantages of cost savings and time efficiency. Klippa’s automated solution reduces the need for manual data entry and analysis, saving costs and allowing your team to focus on core business activities.
How to Convert Outlook Emails to Excel
Tired of copy-pasting data from Outlook into Excel? There’s a better way. With Klippa DocHorizon, you can automate the entire process; no more manual work, no more formatting headaches. Just set up a simple flow, capture the data you need from emails and attachments, and export it directly to Excel.
Here’s how to get started in a few easy steps.
Step 1: Sign Up on The Platform
The first step in automating your Outlook email conversion to Excel is to sign up for our DocHorizon Platform. Signing up is straightforward: just visit Klippa’s website, click on the sign-up button, and fill in the required details.
Once registered, you’ll receive €25 in free credits so you can explore the platform’s features and see if Klippa DocHorizon is the right solution.
After this, create an organization and set up a project to access the services.
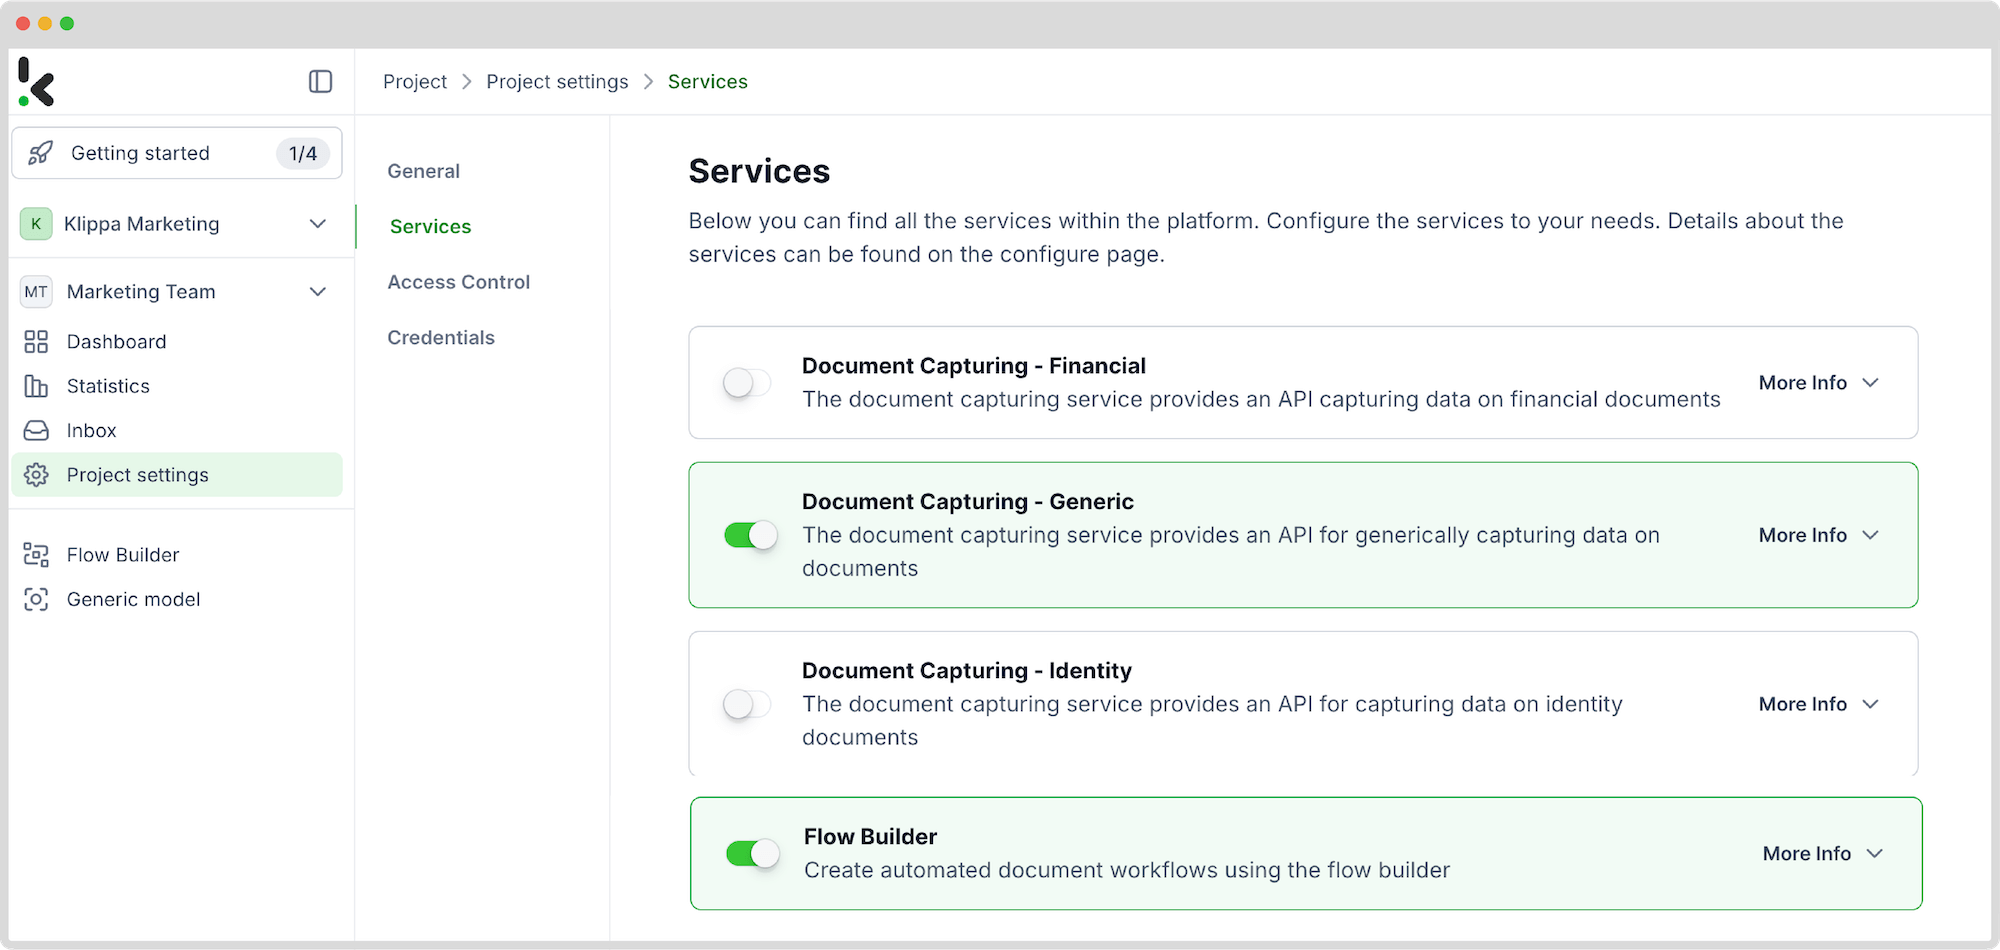
Now, you can select the Document Capturing – Generic Model and Flow Builder services, just as seen in the image below. And you are ready to go!
Step 2: Select Your Input Source
To get the workflow started, go to the platform’s flow builder. A flow is a sequence of steps that define how your receipt data is scanned and then converted to an Excel document.
On the left side, select Flow Builder and create a new flow by clicking New Flow -> + From scratch and assign your flow a name. We’ll name the flow “Outlook to Excel”.
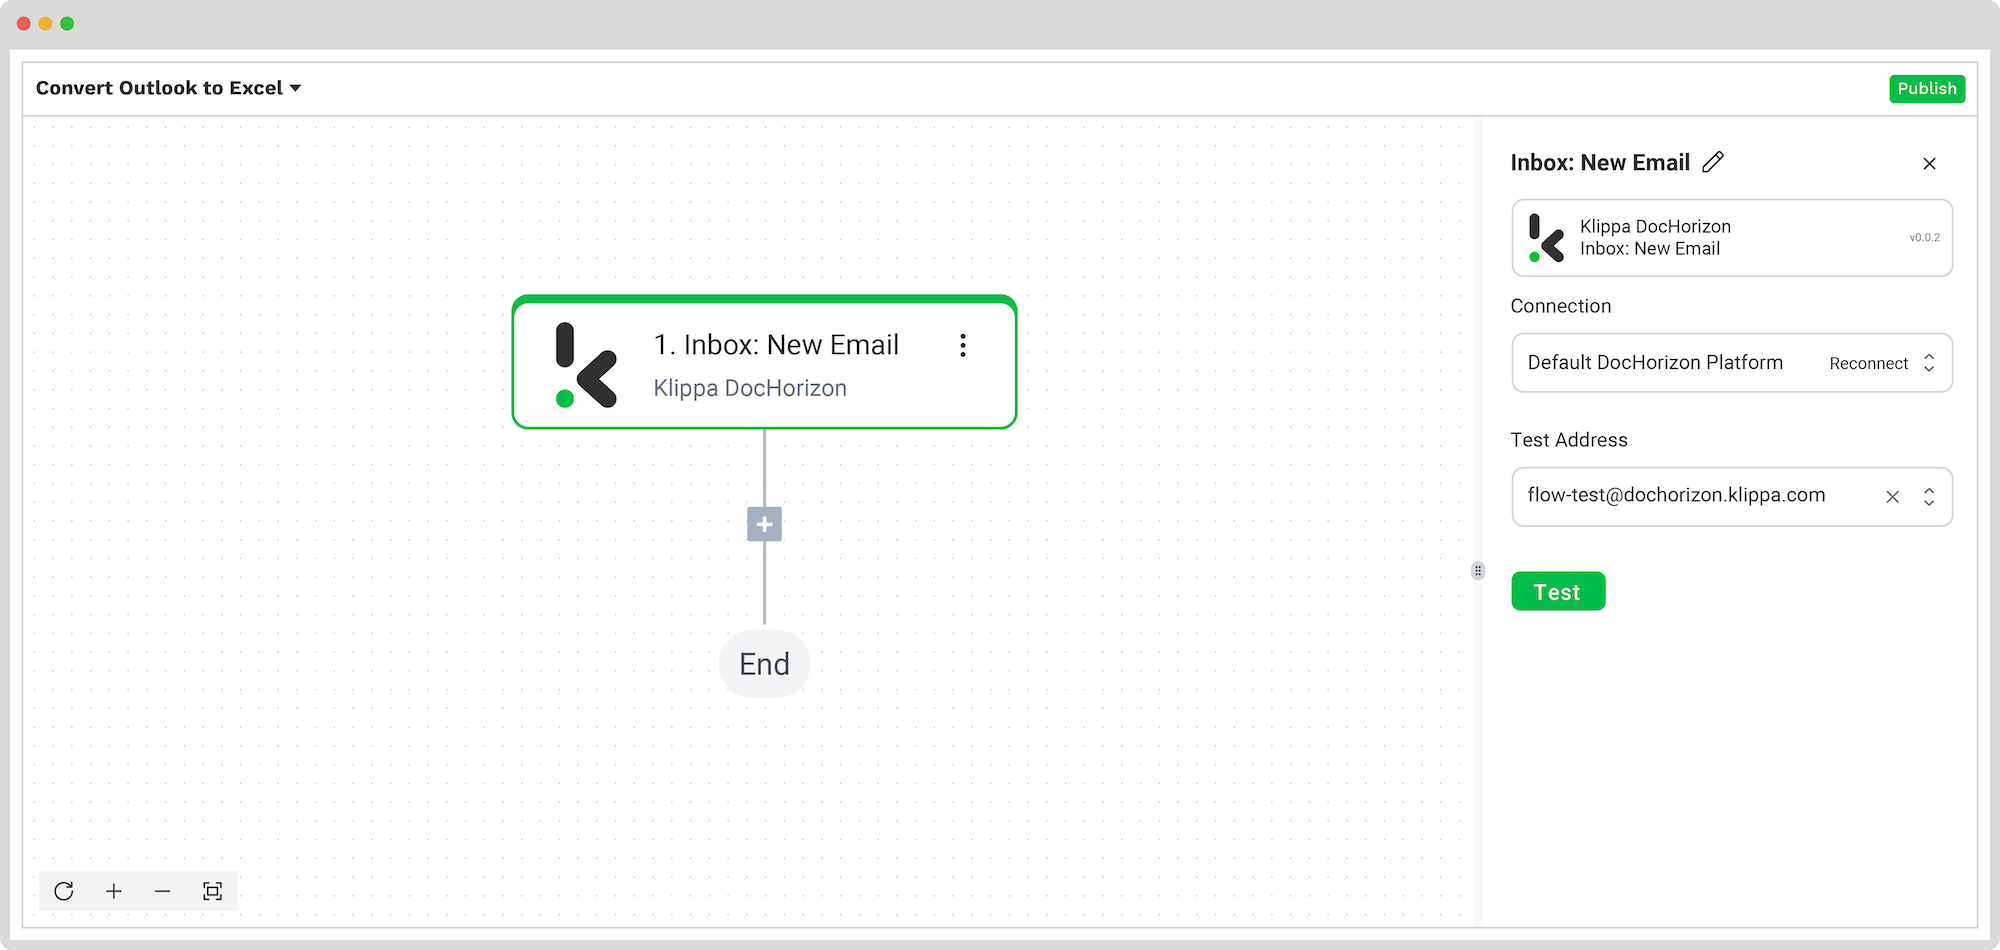
Once you’re in the flow builder, the next step is to select your desired input source by clicking on Select Trigger -> Klippa -> Inbox:New Email. Best would be best to go to your Outlook and redirect emails to the email address created by Klippa for you.
To connect the email account of your choice to the platform, simply provide your login details. And in case you have reservations about data privacy matters, fear not. Klippa is GDPR-compliant and ISO-certified, meaning none of your data is stored on our servers.
For this example, we will retrieve an email attachment to work with, such as an invoice.
Test this step by clicking on Load Sample Data: remember to have at least one sample document in your input folder while setting up your flow.
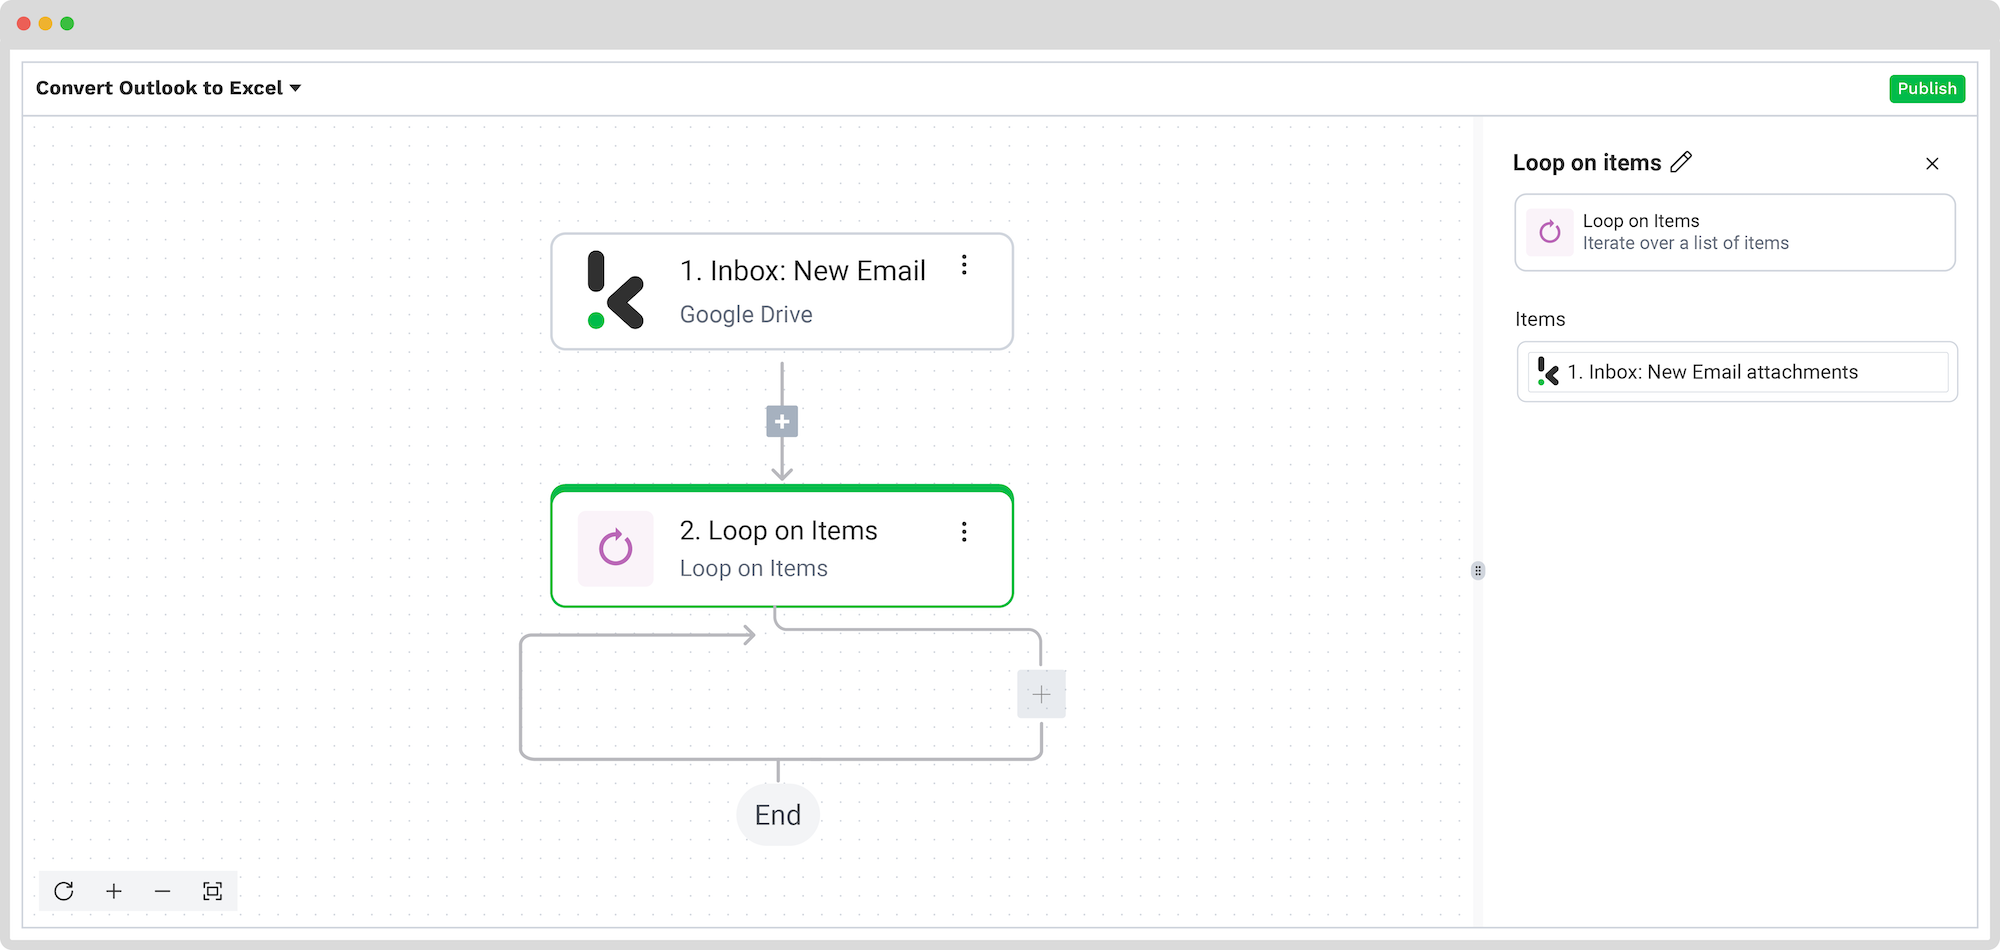
Step 3: Select Which Items Should Be Looped In
Now, search for the Loop in items function so the platform knows which items it should access. Our was renamed “Loop on all attachments,” meaning incoming emails’ attachments will be looped in the flow. This was done by going to the Items section and clicking on the box. From the data selector menu, select New Email -> message -> attachments.
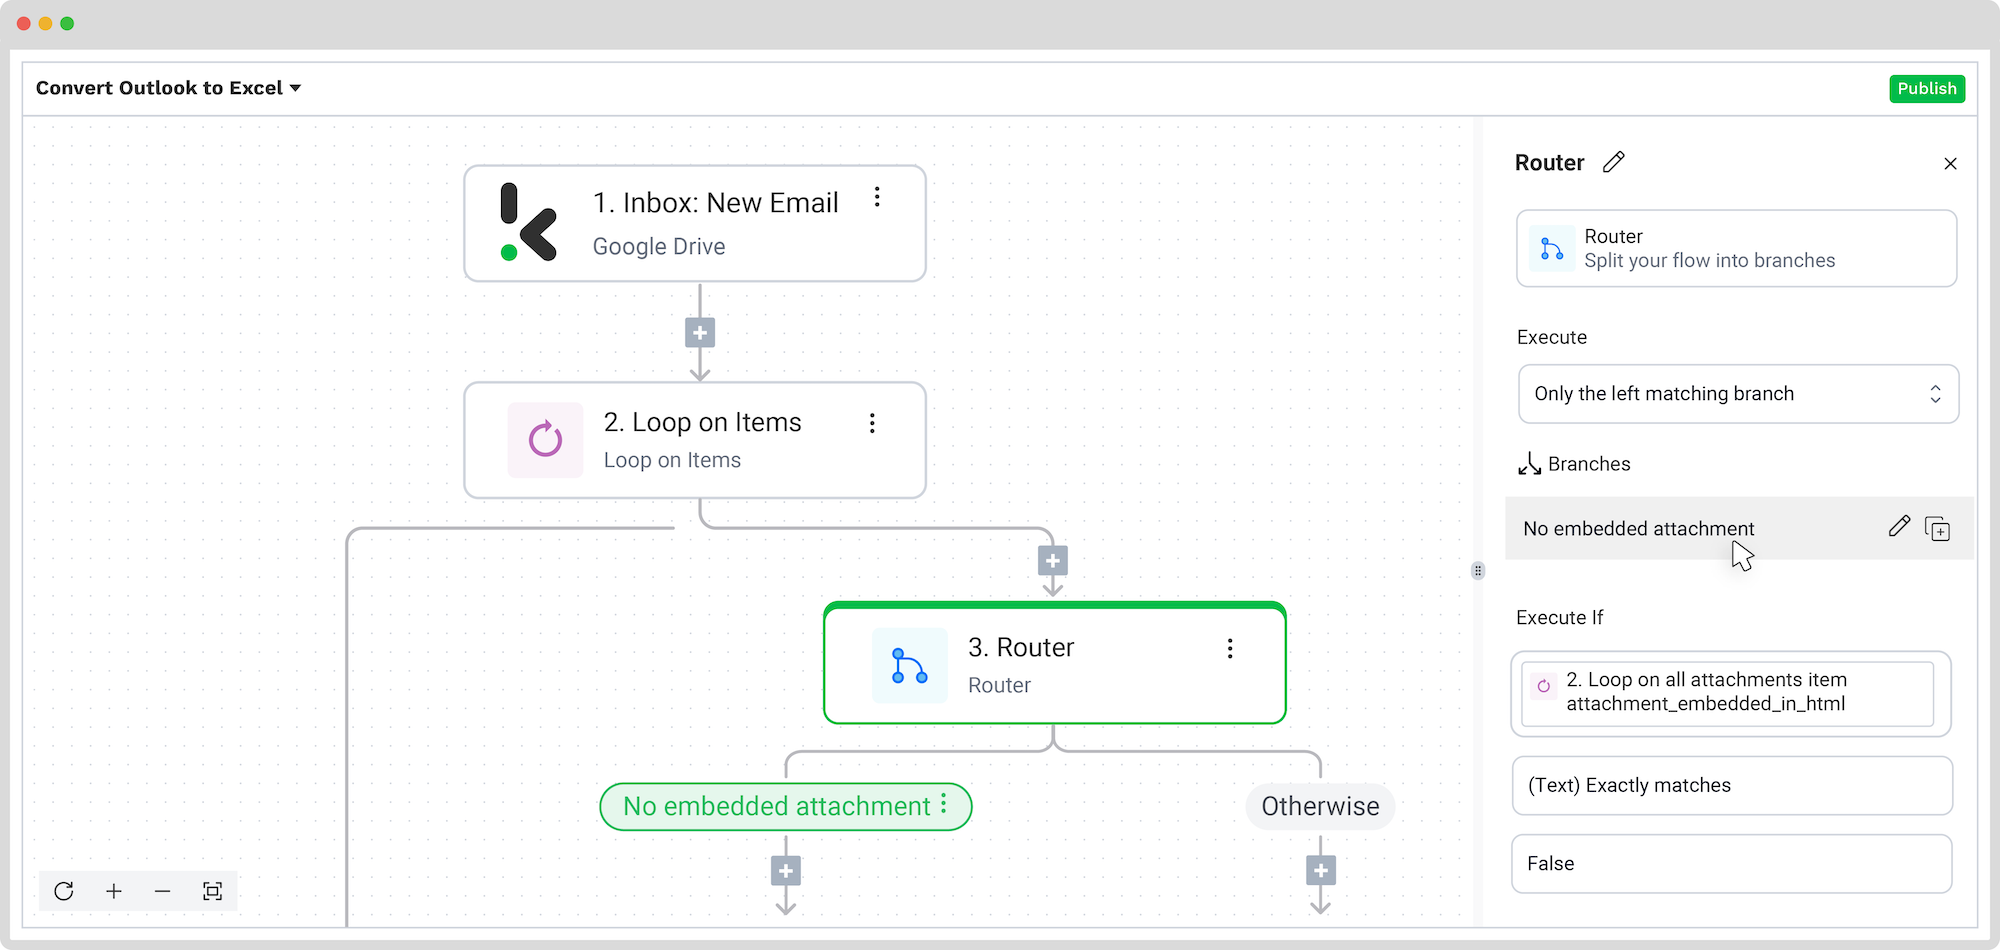
Step 4: Create a Conditional Routing
Sometimes, emails received might have the sender’s digital signature, including a photo. This is also called an attachment. For the platform to know how to avoid these attachments, you need to use the Router option.
This means that you can define what the platform should do when certain conditions we set are met or not. For our example, the condition will be whether the email has an embedded attachment or not. The possible solutions will be No embedded attachment or Otherwise. We’ll need to create only the first one.
To do this, we are going to select Execute: Only the first (left) matching branch and set the rules by clicking on Branch 1:
- For the first value: 2. Loop on all attachments -> item -> attachment_embedded_in_html
- Text: (Text) Exactly Matches
- For the second value: false
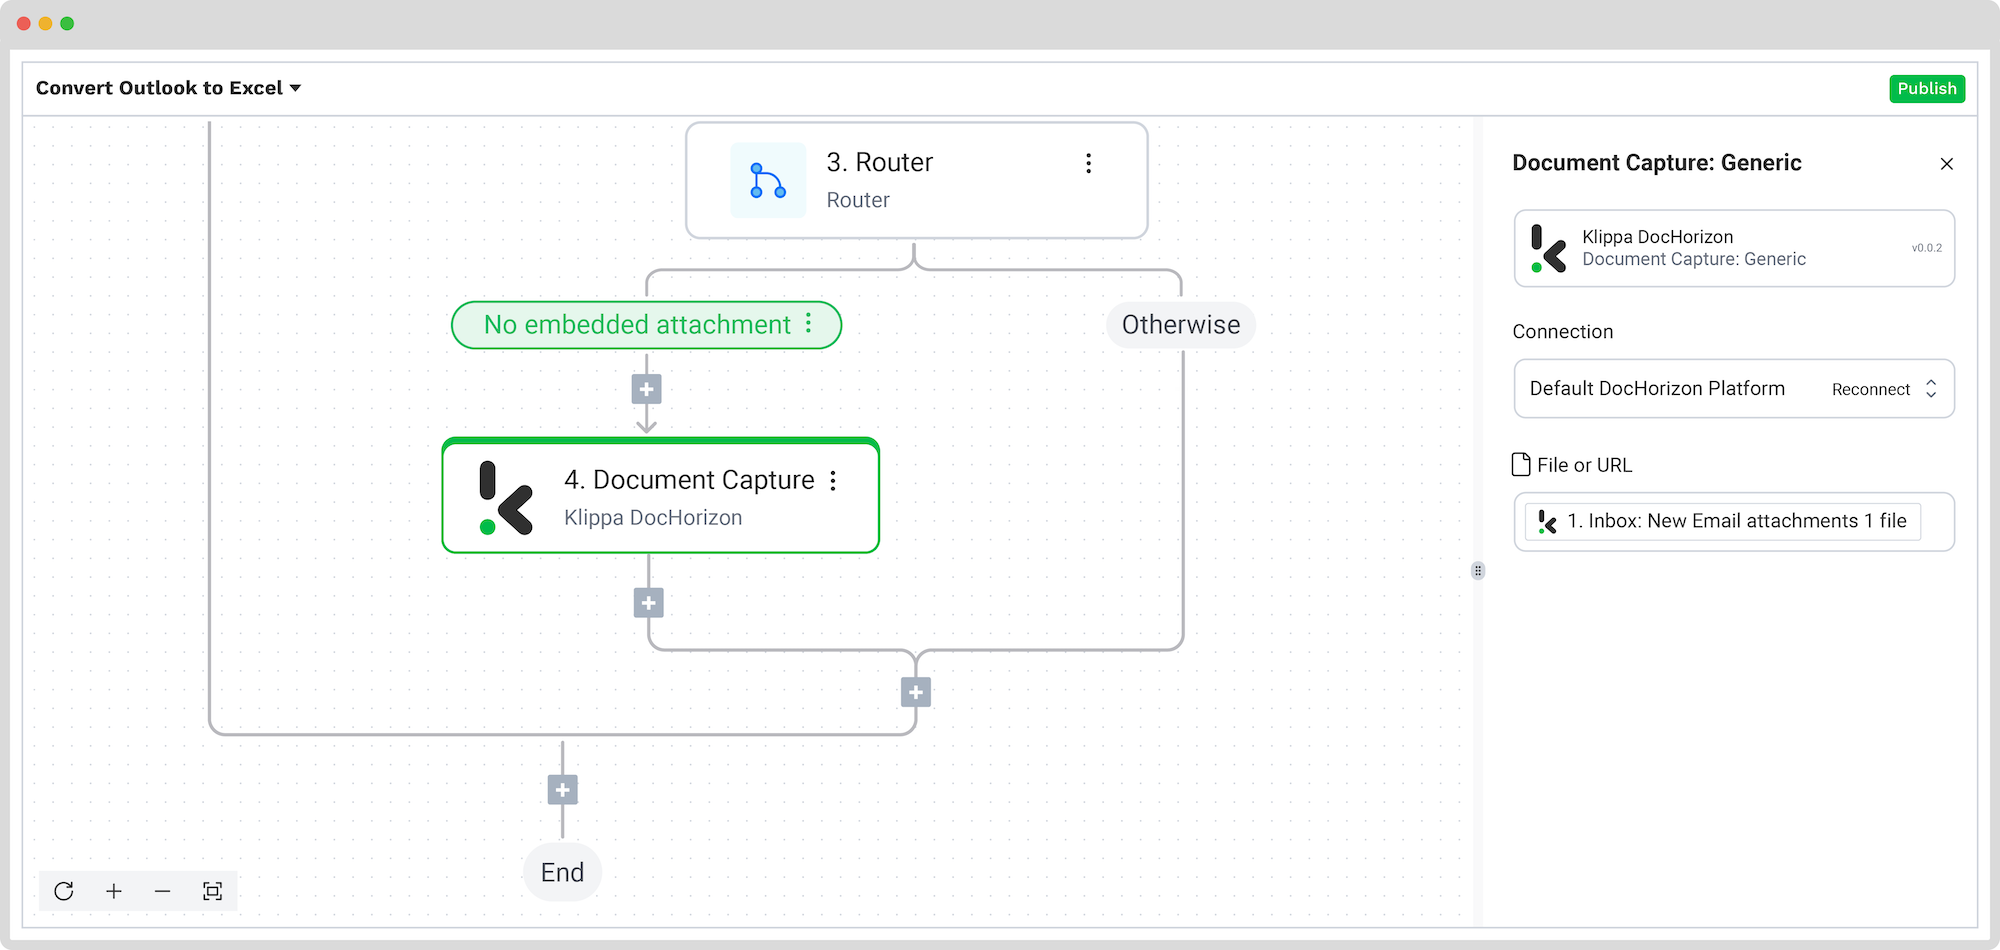
Step 5: Capture and Extract Data
Continuing on the left branch, we need to define what will happen if the condition before is met. If the email has no embedded attachment, then we’d like to capture and extract from its attachment.
Click on the + button and search for Document capture: Generic. Create a connection again with the Default DocHorizon Platform. For File or URL, click the box and pick from the menu Inbox: New Email -> attachments -> attachments [1] -> file (the identification URL for the file’s data).
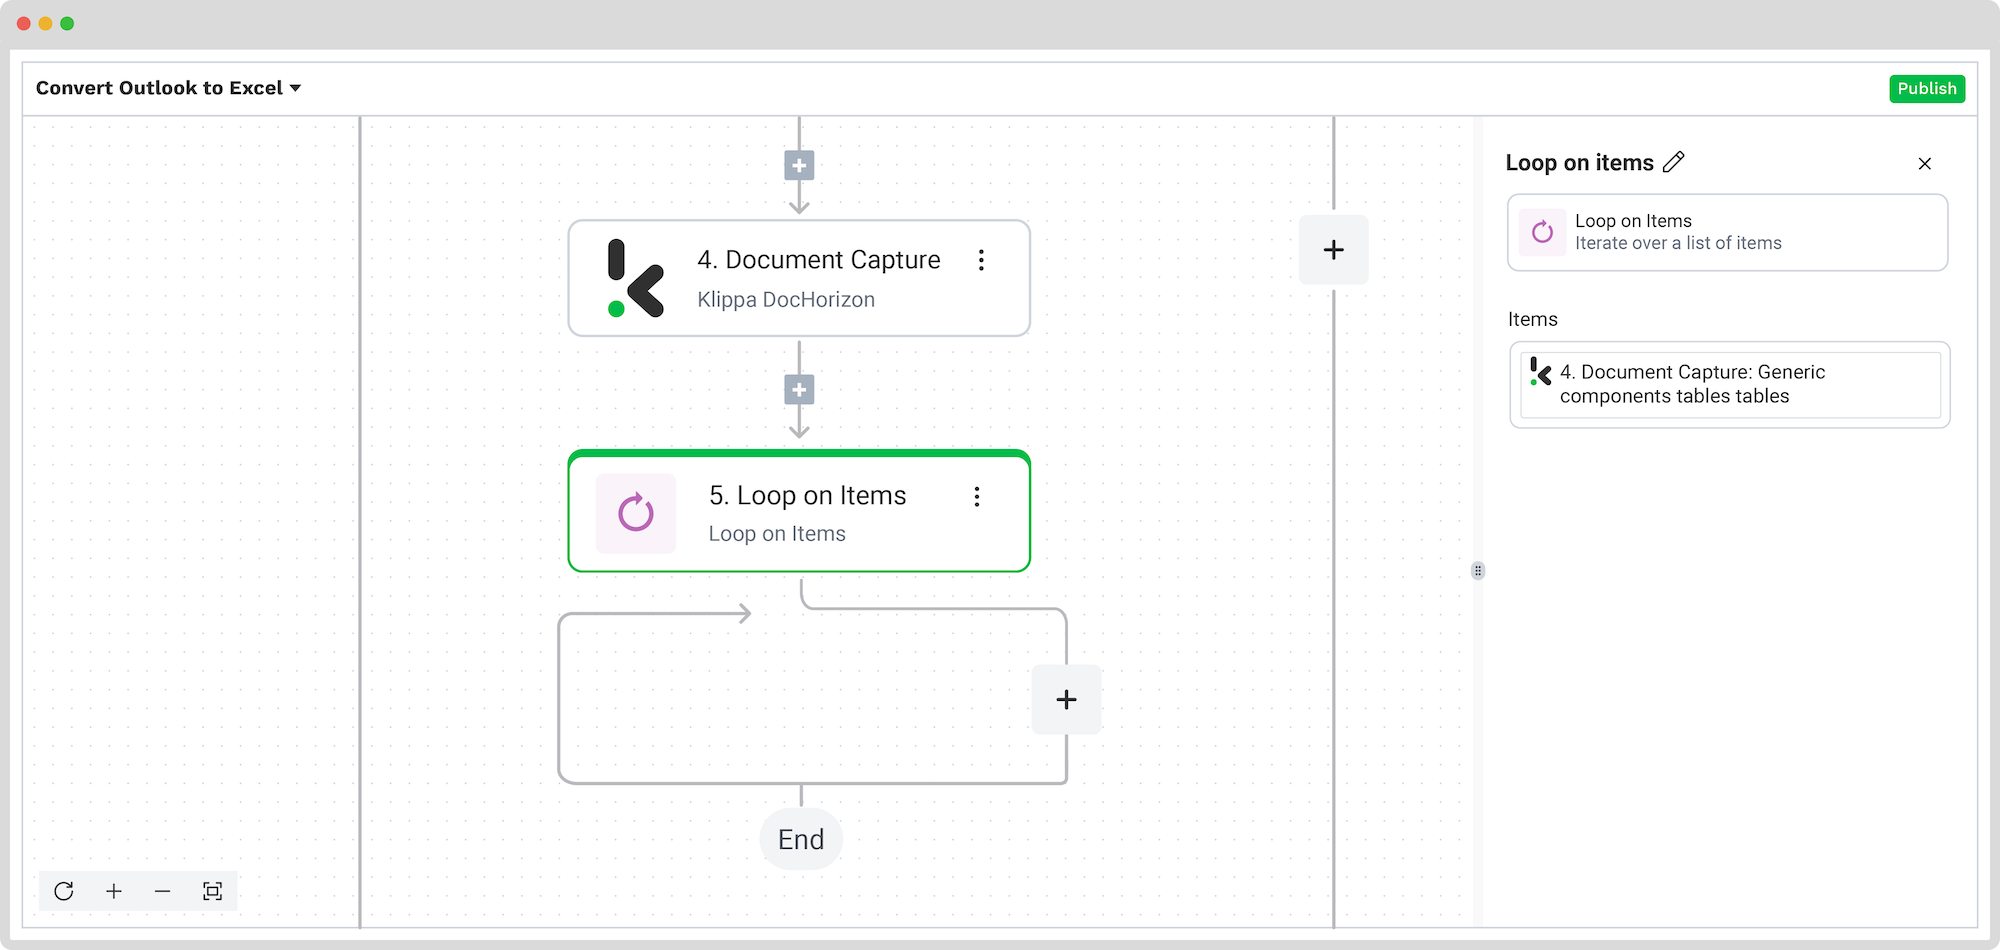
Step 6: Loop in items
Now, you’ll instruct the platform on which components to loop each time the flow is triggered, meaning which elements from the email attachments you want to be processed and, eventually, converted to Excel.
For us, our example was an invoice, and we wanted to have all the tables from the invoice processed. You can do this by selecting again Loop on items as the next step. For the Items section, click on the box, and, from the Data Selector menu, select Document Capture: Generic -> components -> tables -> tables [1].
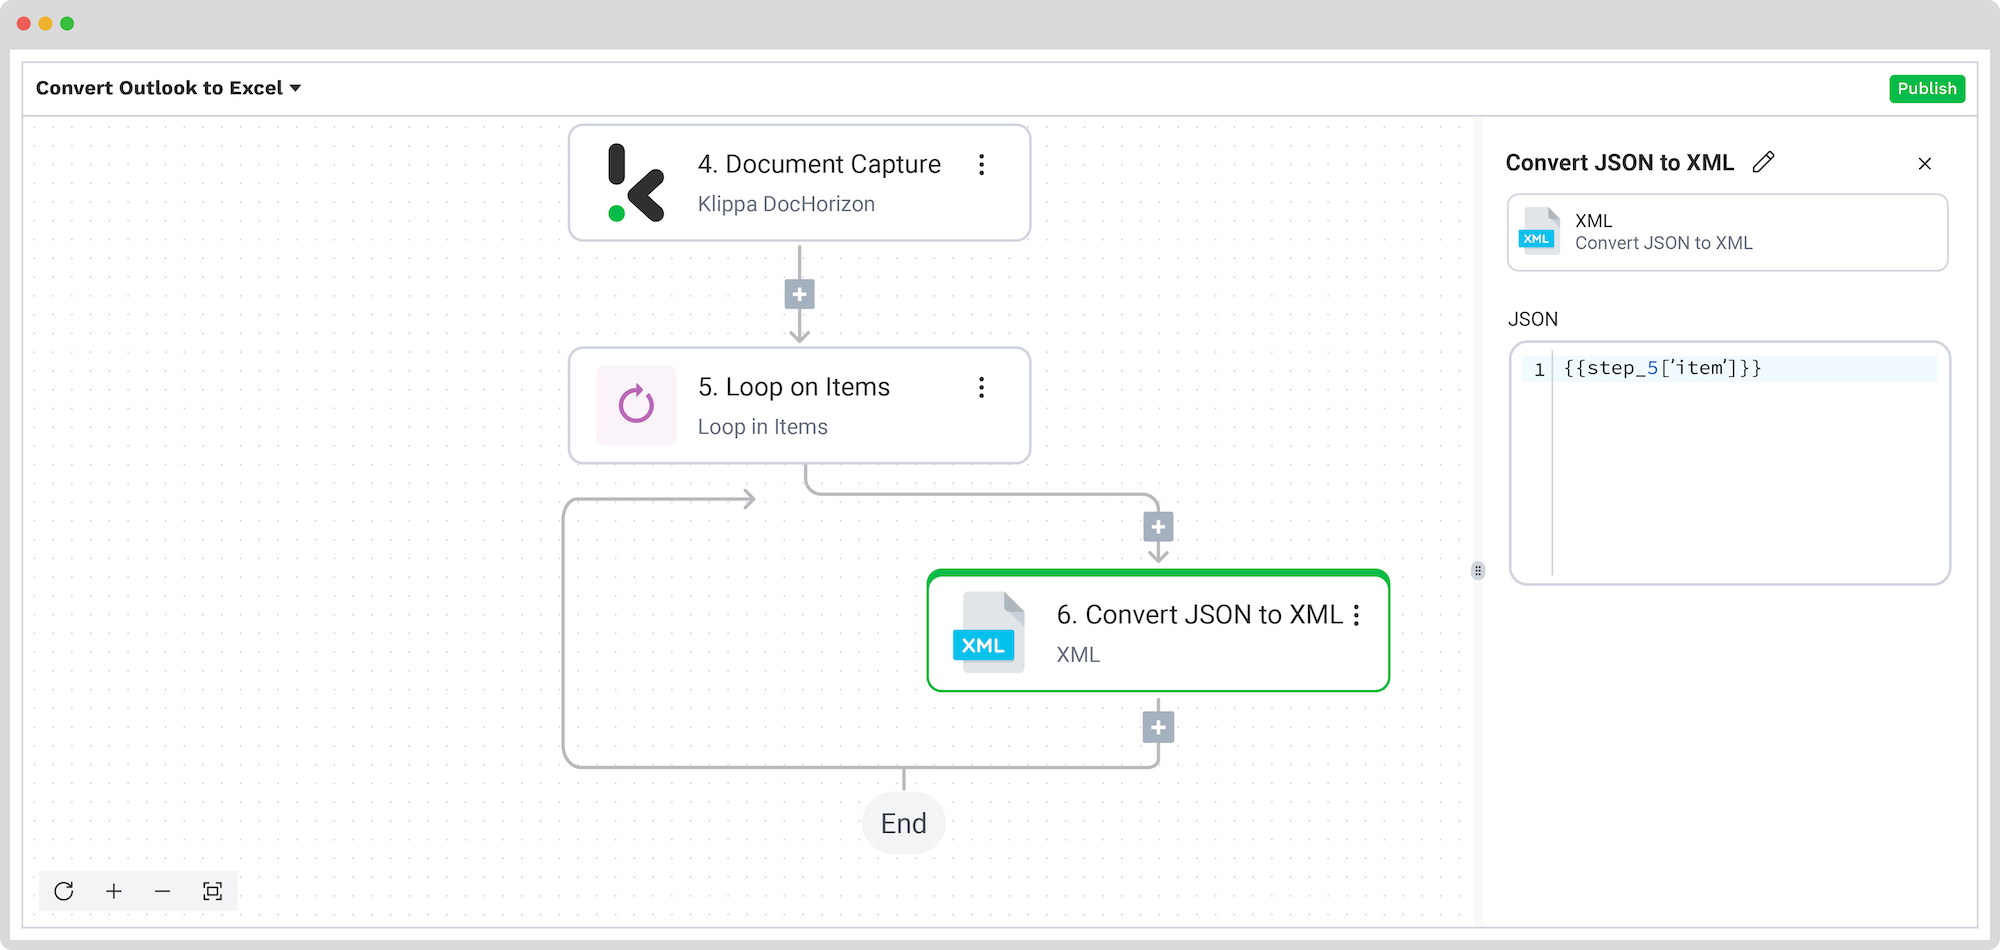
Step 7: Convert JSON to XML
Because you want to convert the emails’ attachments to a format other than JSON, you need to convert the extracted data. You can do this by adding another step, namely, Convert JSON to XML. This can be easily found in the list. On the right side, for the JSON section, choose 5. Loop on items->item.
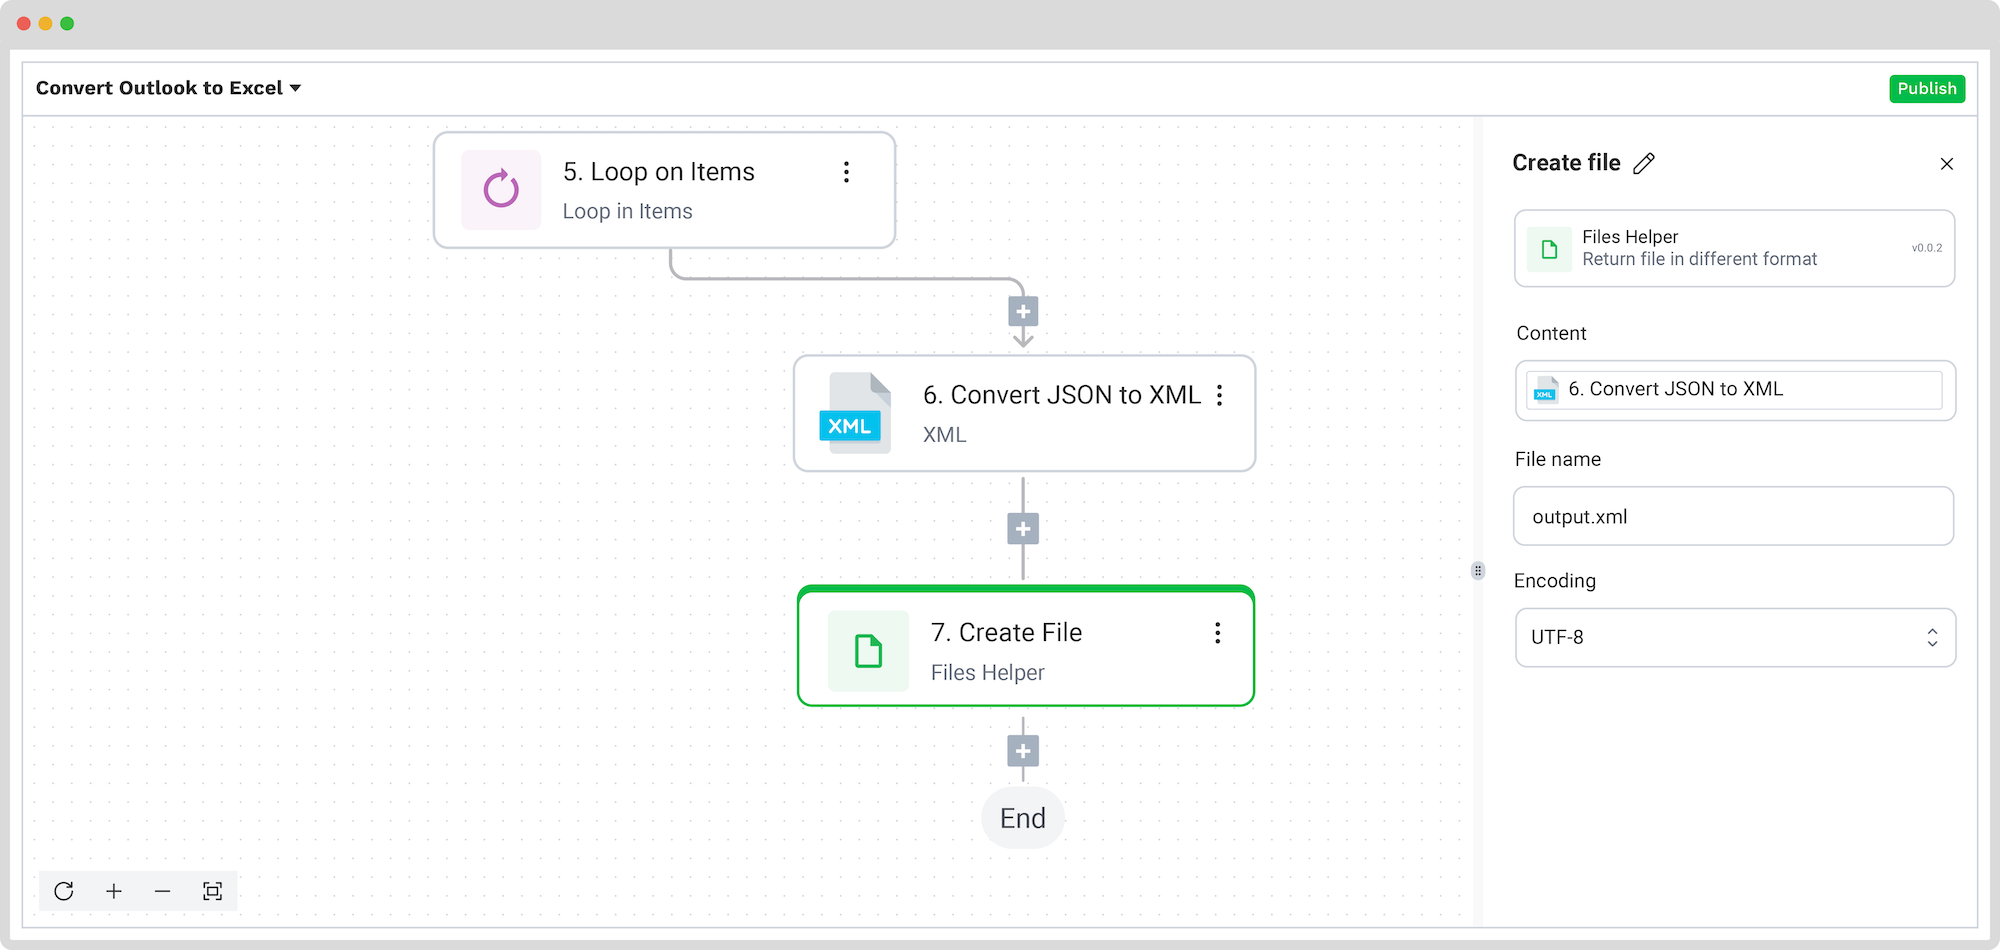
Step 8: Create an XML file
After the conversion, the next step is to create a file with the XML extension by choosing Create file as the next step and filling in the next sections on the right side:
- For Content: Select Convert JSON to XML from the Data Selector menu.
- For File Name: Any name will do, such as output.xml.
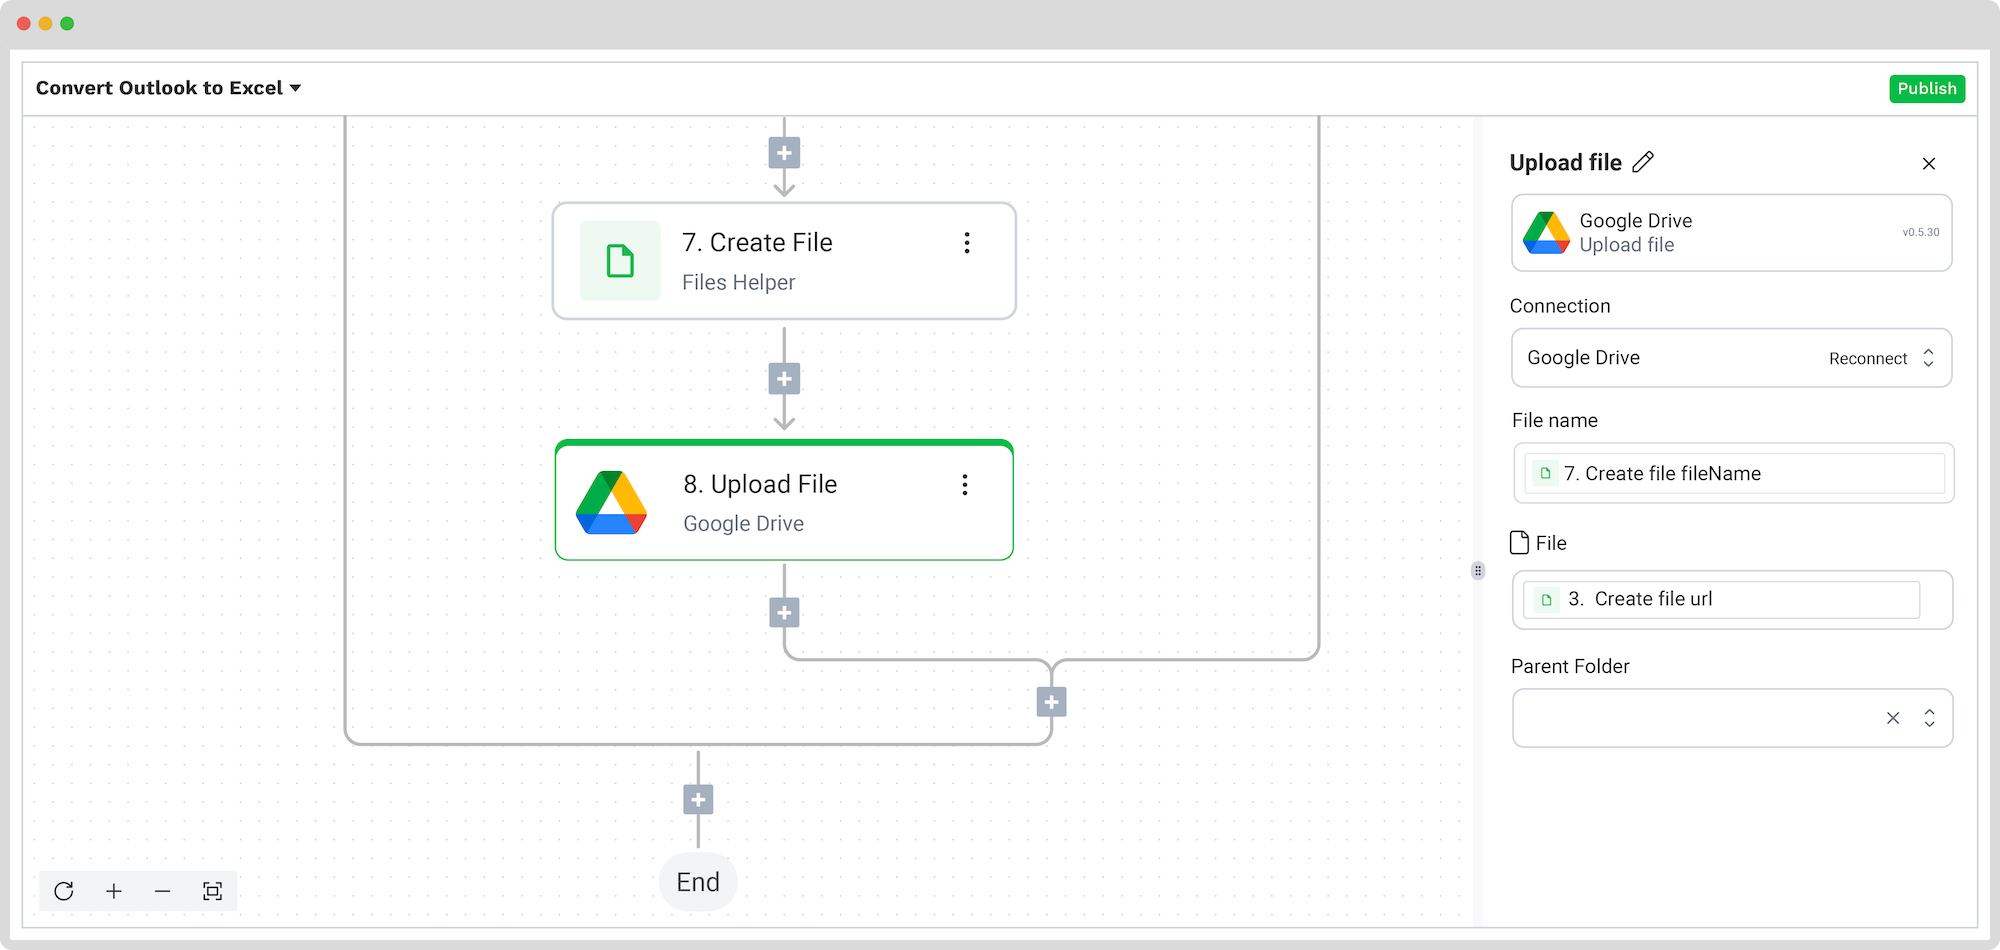
Step 9: Export to Desired Destination
The final step in the process is exporting the selected data to the application of your choice. Klippa allows you to choose from various output formats and destinations, but for this use case, we’ll showcase Google Drive as a possible export destination.
Look for Google Drive -> Upload file and connect it to the DocHorizon platform. Then, for the File name section, select from the menu Create file -> file -> fileName. For File, do the same steps but choose URL instead of fileName. Lastly, for Parent Folder, pick the folder where you want the new files to be uploaded.
And it’s done! With just a few clicks, your data is seamlessly transferred to an Excel spreadsheet or your own database, ready for use.
Besides data extraction and conversion features of the platform, DocHorizon can fulfill all your document-related needs and completely automate the flow. Curious to see what that entails? Keep reading!
And remember: if you’re processing a high volume of documents, you don’t have to set up the flow yourself. We’d love to hear about your use case and help you get started!
Automate Email Conversion to Excel with Klippa
Converting your Outlook emails into Excel spreadsheets no longer needs to be a burden. With Klippa’s DocHorizon platform, you can streamline and automate this process, saving valuable time and ensuring accuracy in your data management efforts. With this IDP platform, you gain access to:
- Complex yet user-friendly interface, perfect for automating document workflows
- Smart data capture and extraction for Excel-friendly formats and many more
- Intelligent document verification, which allows you to verify the authenticity of all processed documents
- GDPR and ISO-compliant processes, ensuring your data is protected and handled securely
Looking forward to taking your document processing to the next level? Contact our experts for any additional information or questions you might have, or book a free demo below! Experience the ease and efficiency of automated Outlook email parsing to Excel with Klippa.
FAQ
Converting Outlook emails to Excel helps you organize, analyze, and archive important information more efficiently. It enables better data management, easier tracking of communications, faster reporting, and deeper insights through Excel’s analysis tools.
While Outlook doesn’t provide built-in automation for exporting emails to Excel, you can use third-party tools like Klippa’s Dochorizon or write VBA macros to automate the process. The last one requires additional setup and technical knowledge.
Yes, Klippa DocHorizon can process email attachments. It allows you to define workflows that extract data from attachments and include it in the final Excel output.
Yes, Klippa offers a free trial with €25 in credits, allowing you to explore the platform’s features and capabilities before deciding.